User guide
Connect AI tools to Nshamah
Link your Nshamah account to an AI assistant such as Claude, ChatGPT or Cursor, then ask it in Arabic or English to build question banks or publish posts for you. You decide the permissions, and you can revoke them at any moment.
Open the settings pageWhat is this feature?
The connection uses a standard called MCP (Model Context Protocol). Think of it as a universal socket: Nshamah exposes one server address and any assistant that supports MCP can plug into it.
Once connected, the assistant acts on your account only, and only within the permissions you granted.
What the assistant can do
- View your knowledge banks (drafts included), their questions and stats.
- Create a bank with its questions (up to 50 per request, 500 per bank).
- Add, edit, delete and reorder questions.
- Edit a bank's title, description and exam settings; set a cover image or a question image.
- Change a bank's visibility: draft, followers only, or public.
- Publish a post on your profile or in a community you belong to, and delete your posts.
What it cannot do
- Delete a whole bank: that stays in the website.
- Publish image or video posts.
- Access your messages, financial data or other people's accounts.
The three permissions
When you approve, you choose from only three permissions:
| View your knowledge banks and their questions | Read-only. |
| Create and edit knowledge banks and questions | Includes reading automatically. |
| Publish and delete posts | Publish and delete posts on your account. |
Any request that needs a permission you did not grant is rejected and appears in the activity log as "Denied".
How to connect
- 1Sign in to Nshamah and open Settings, then "Connect AI tools".
- 2Copy the server address (MCP) with the Copy button.
- 3Add the address in the assistant you use (details below).
- 4On first use a consent page opens on Nshamah: choose the permissions and press "Allow".
- 5Go back to the assistant and start typing.
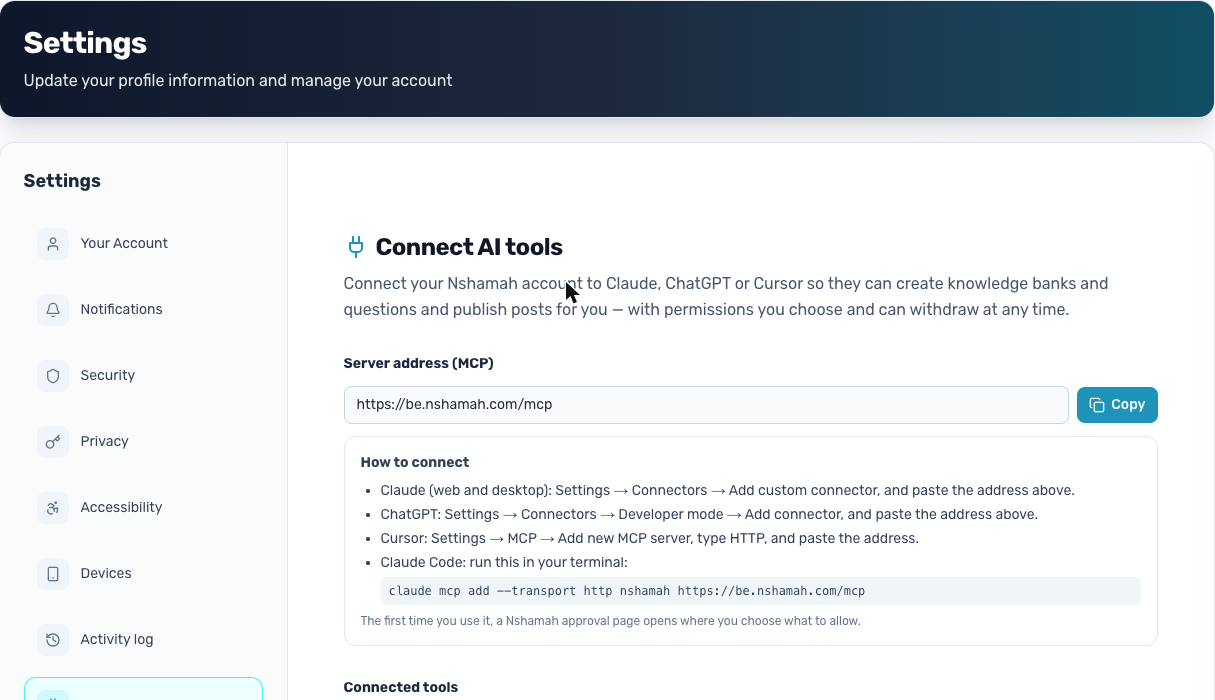
Settings → Connect AI tools
- 1Server address: https://be.nshamah.com/mcp
- 2Copy button to copy the address in one click.
- 3Per-tool connection summary and a ready-to-paste Claude Code command.
Connect by tool
Claude (web and app)
- Settings → Connectors.
- Choose "Add custom connector".
- Paste the server address, then approve on the Nshamah page.
ChatGPT
- Open Settings → Plugins (formerly called Connectors).
- Press Add, then Add custom MCP server.
- Enter the name Nshamah, paste the server address in Server URL and leave Authentication on OAuth.
- Tick "I understand and want to continue", create the connector, then approve on the Nshamah page.
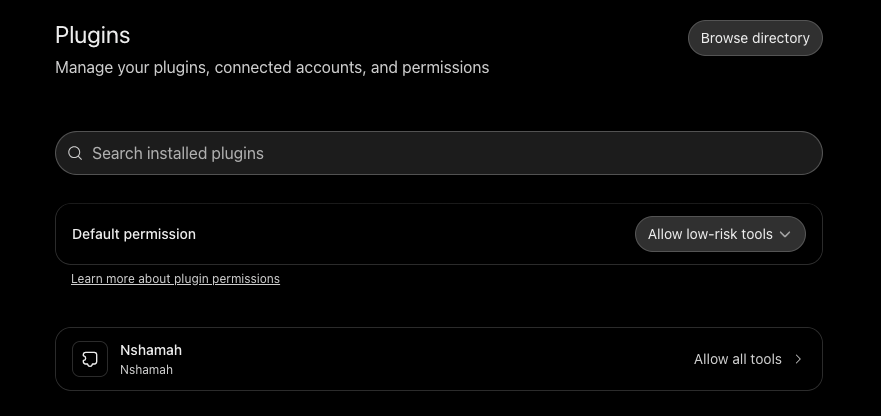
ChatGPT Plugins settings
- 1Settings → Plugins: added connectors and their permissions appear here.
- 2Browse directory opens the plugin directory.
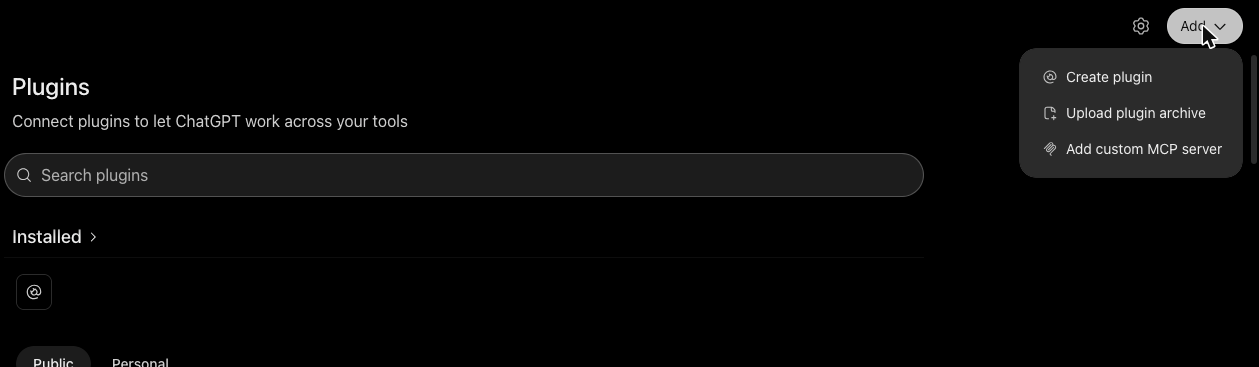
The Add menu
- 1Press Add at the top of the page.
- 2Choose Add custom MCP server.
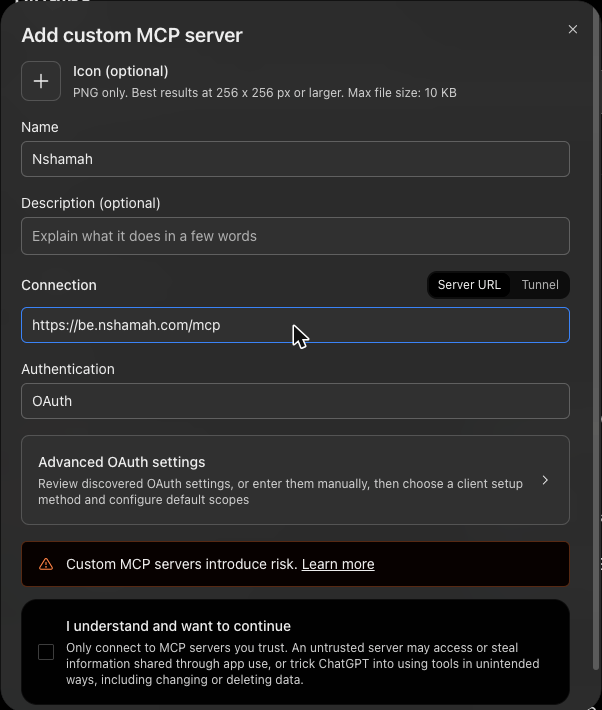
Add server form
- 1Name: Nshamah.
- 2Server URL: https://be.nshamah.com/mcp.
- 3Authentication: leave it on OAuth, tick "I understand and want to continue", then create.
Cursor
- Settings → MCP.
- Choose Add new MCP server, type HTTP.
- Paste the server address, then approve on the Nshamah page.
Claude Code
- Run this command in your terminal, then run /mcp and pick nshamah to finish approval.
claude mcp add --transport http nshamah https://be.nshamah.com/mcpVS Code, Windsurf, Claude Desktop, Perplexity and Mistral Le Chat are supported too. Menu names may change between versions of each tool.
The consent page
It shows the tool's name and the address you will be returned to after approving. Make sure it is the tool you intended.
Pick at least one permission and press "Allow", or "Deny" to cancel. New banks are created as drafts that only you can see.
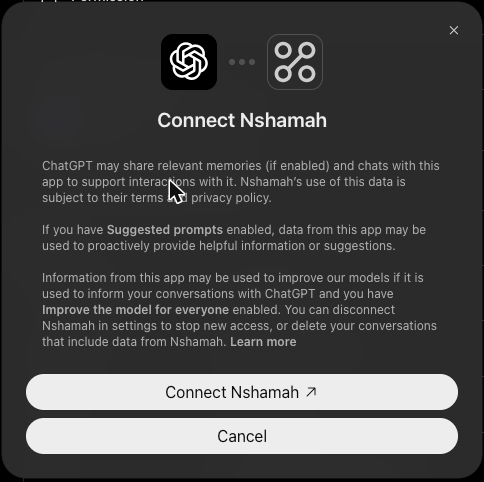
Step 1: the ChatGPT dialog
- 1This dialog appears after you create the connector.
- 2Press "Connect Nshamah" to go to the Nshamah site.
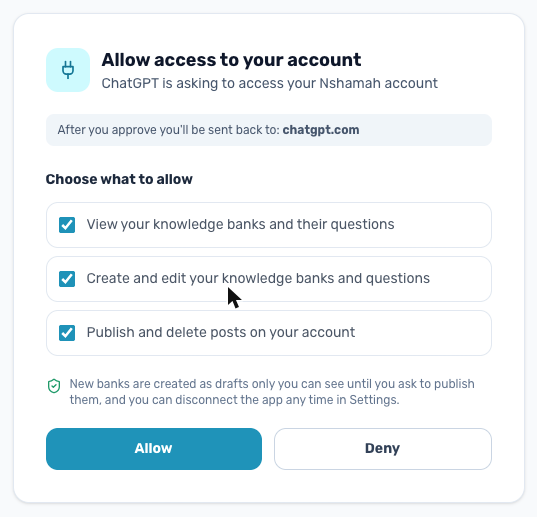
Step 2: the Nshamah consent page
- 1The tool requesting access (ChatGPT) and the site you will return to.
- 2The three permissions: untick any you do not want to grant.
- 3"Allow" completes the connection, "Deny" cancels.
Example requests
- Create a 15-question bank about Jordanian history for grade 9.
- Here is a text (paste it): turn it into 10 multiple-choice questions.
- Add 5 true/false questions to my "Physics" bank.
- Show my banks' stats: which one has the most attempts?
- Write a post about the value of reading and publish it once I approve.
Some assistants also expose two ready-made templates: BuildQuestionBank (build a bank from a topic or text) and WritePost (draft a post, publish after your approval).
Managing connected tools
On the same page you see every connected tool with its connection date, last use and permissions, and you can cut it off with the Disconnect button; access stops immediately. Below it is a log of recent operations.
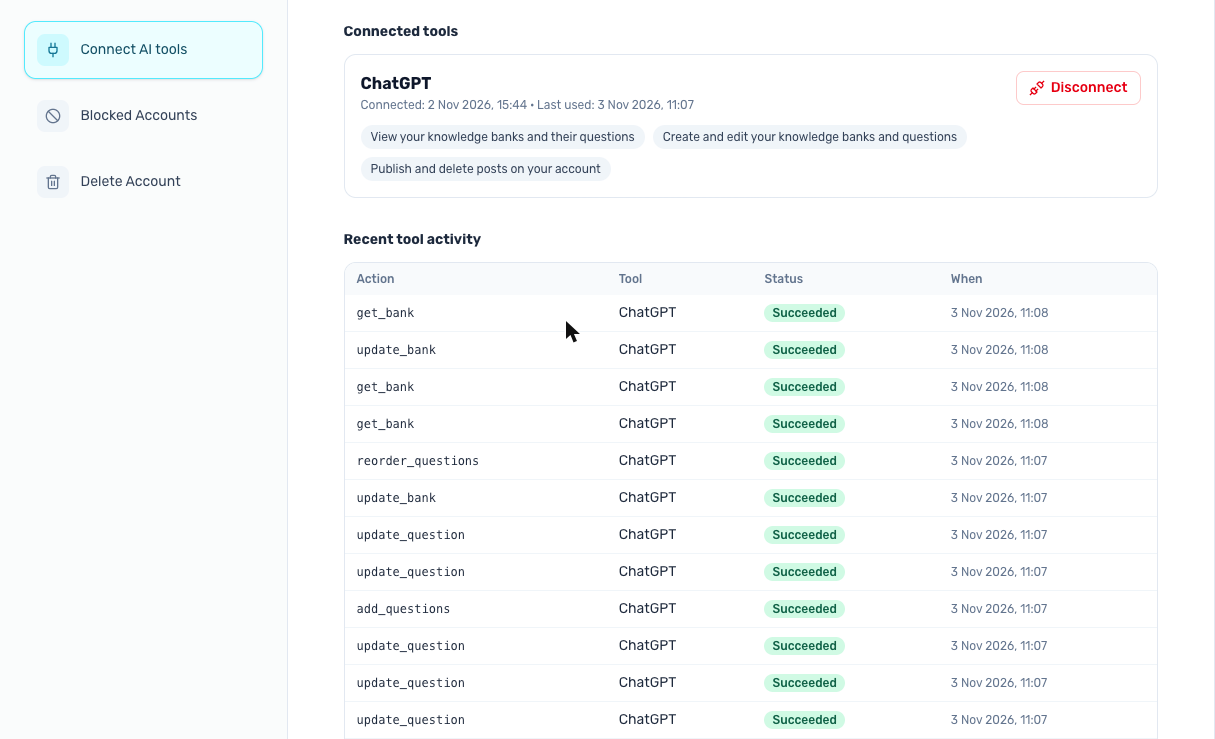
Connected tools and activity log
- 1Tool name, connection date and last use.
- 2Granted permissions shown as tags.
- 3Disconnect removes access immediately.
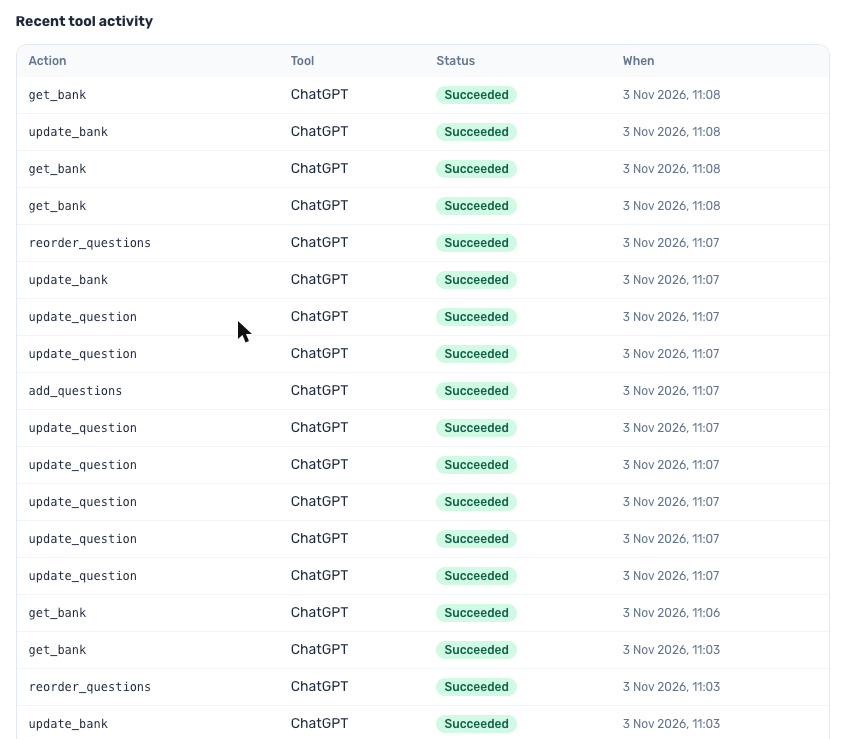
Recent tool activity table
- 1Operation: e.g. get_bank, update_question, add_questions.
- 2The tool that ran it.
- 3Status and time. Review it if something looks unexpected.
| Succeeded | The operation ran. |
| Failed | An error occurred, for example invalid data. |
| Denied | Permission not granted or the limit was exceeded. |
Safety and privacy
- Draft first: a new bank is created hidden until you explicitly ask to publish it.
- Approval before publishing: the assistant is instructed to show you the text before any post goes live, and to confirm deletions with you.
- Your password is never shared: sign-in uses OAuth consent and the assistant never sees it.
- Connections expire: the access token lasts one hour and renews automatically for 30 days, then you approve again.
- Rate limits: 120 read and 30 write requests per minute, plus daily limits on posts and images (30 images a day).
- Images are validated, re-encoded and watermarked like web uploads.
- Audit trail: each operation is logged (name, tool, status, time) without storing its content.
Troubleshooting
| The consent page does not appear | Make sure you are signed in in the same browser and the address was copied in full. |
| "The connection request is invalid or expired" | Go back to the assistant and add the connector again. |
| An operation shows "Denied" | The permission was not granted: disconnect the tool and reconnect with it ticked. |
| Sudden failures after a while | The connection expired; approve again. |
| The assistant does not see Nshamah tools | Start a new chat and check the connector is enabled in it. |
| The page fails to load | Press "Retry". |
FAQ
Does my account pay anything?
The connection is free on Nshamah's side. Your assistant subscription (Claude, ChatGPT…) is billed by them.
Can I connect more than one tool?
Yes. All of them are listed and each can be disconnected on its own.
What if the assistant publishes something wrong?
Delete it on the website or ask the assistant to, check the activity log, and disconnect the tool if needed.